Insight's Cloud Commerce Platform (CCx) User Guide
17-1 - How to add an Azure plan subscription
How to add additional Azure plan subscriptions:
CCx is your platform to get the licenses you need. The following details provide instructions on how to add a new Azure Subscription within CCx.
When an Azure subscription is created via your CCx platform, it creates a distinct management entity for Azure services within your organization's tenant. Invoicing will remain consolidated under a single line item associated with your Azure Plan billing container.
Separate cost reports for individual subscriptions are accessible through either the Insight Cloud Consumption Reporting tool (CCR), or your Azure portal.
How to add a new Azure subscription:
- When you log into CCx, you will land on the Dashboard page. Use the top menu to navigate to the Subscriptions list page.
- Select Azure Plan to open the subscription/product detail page.
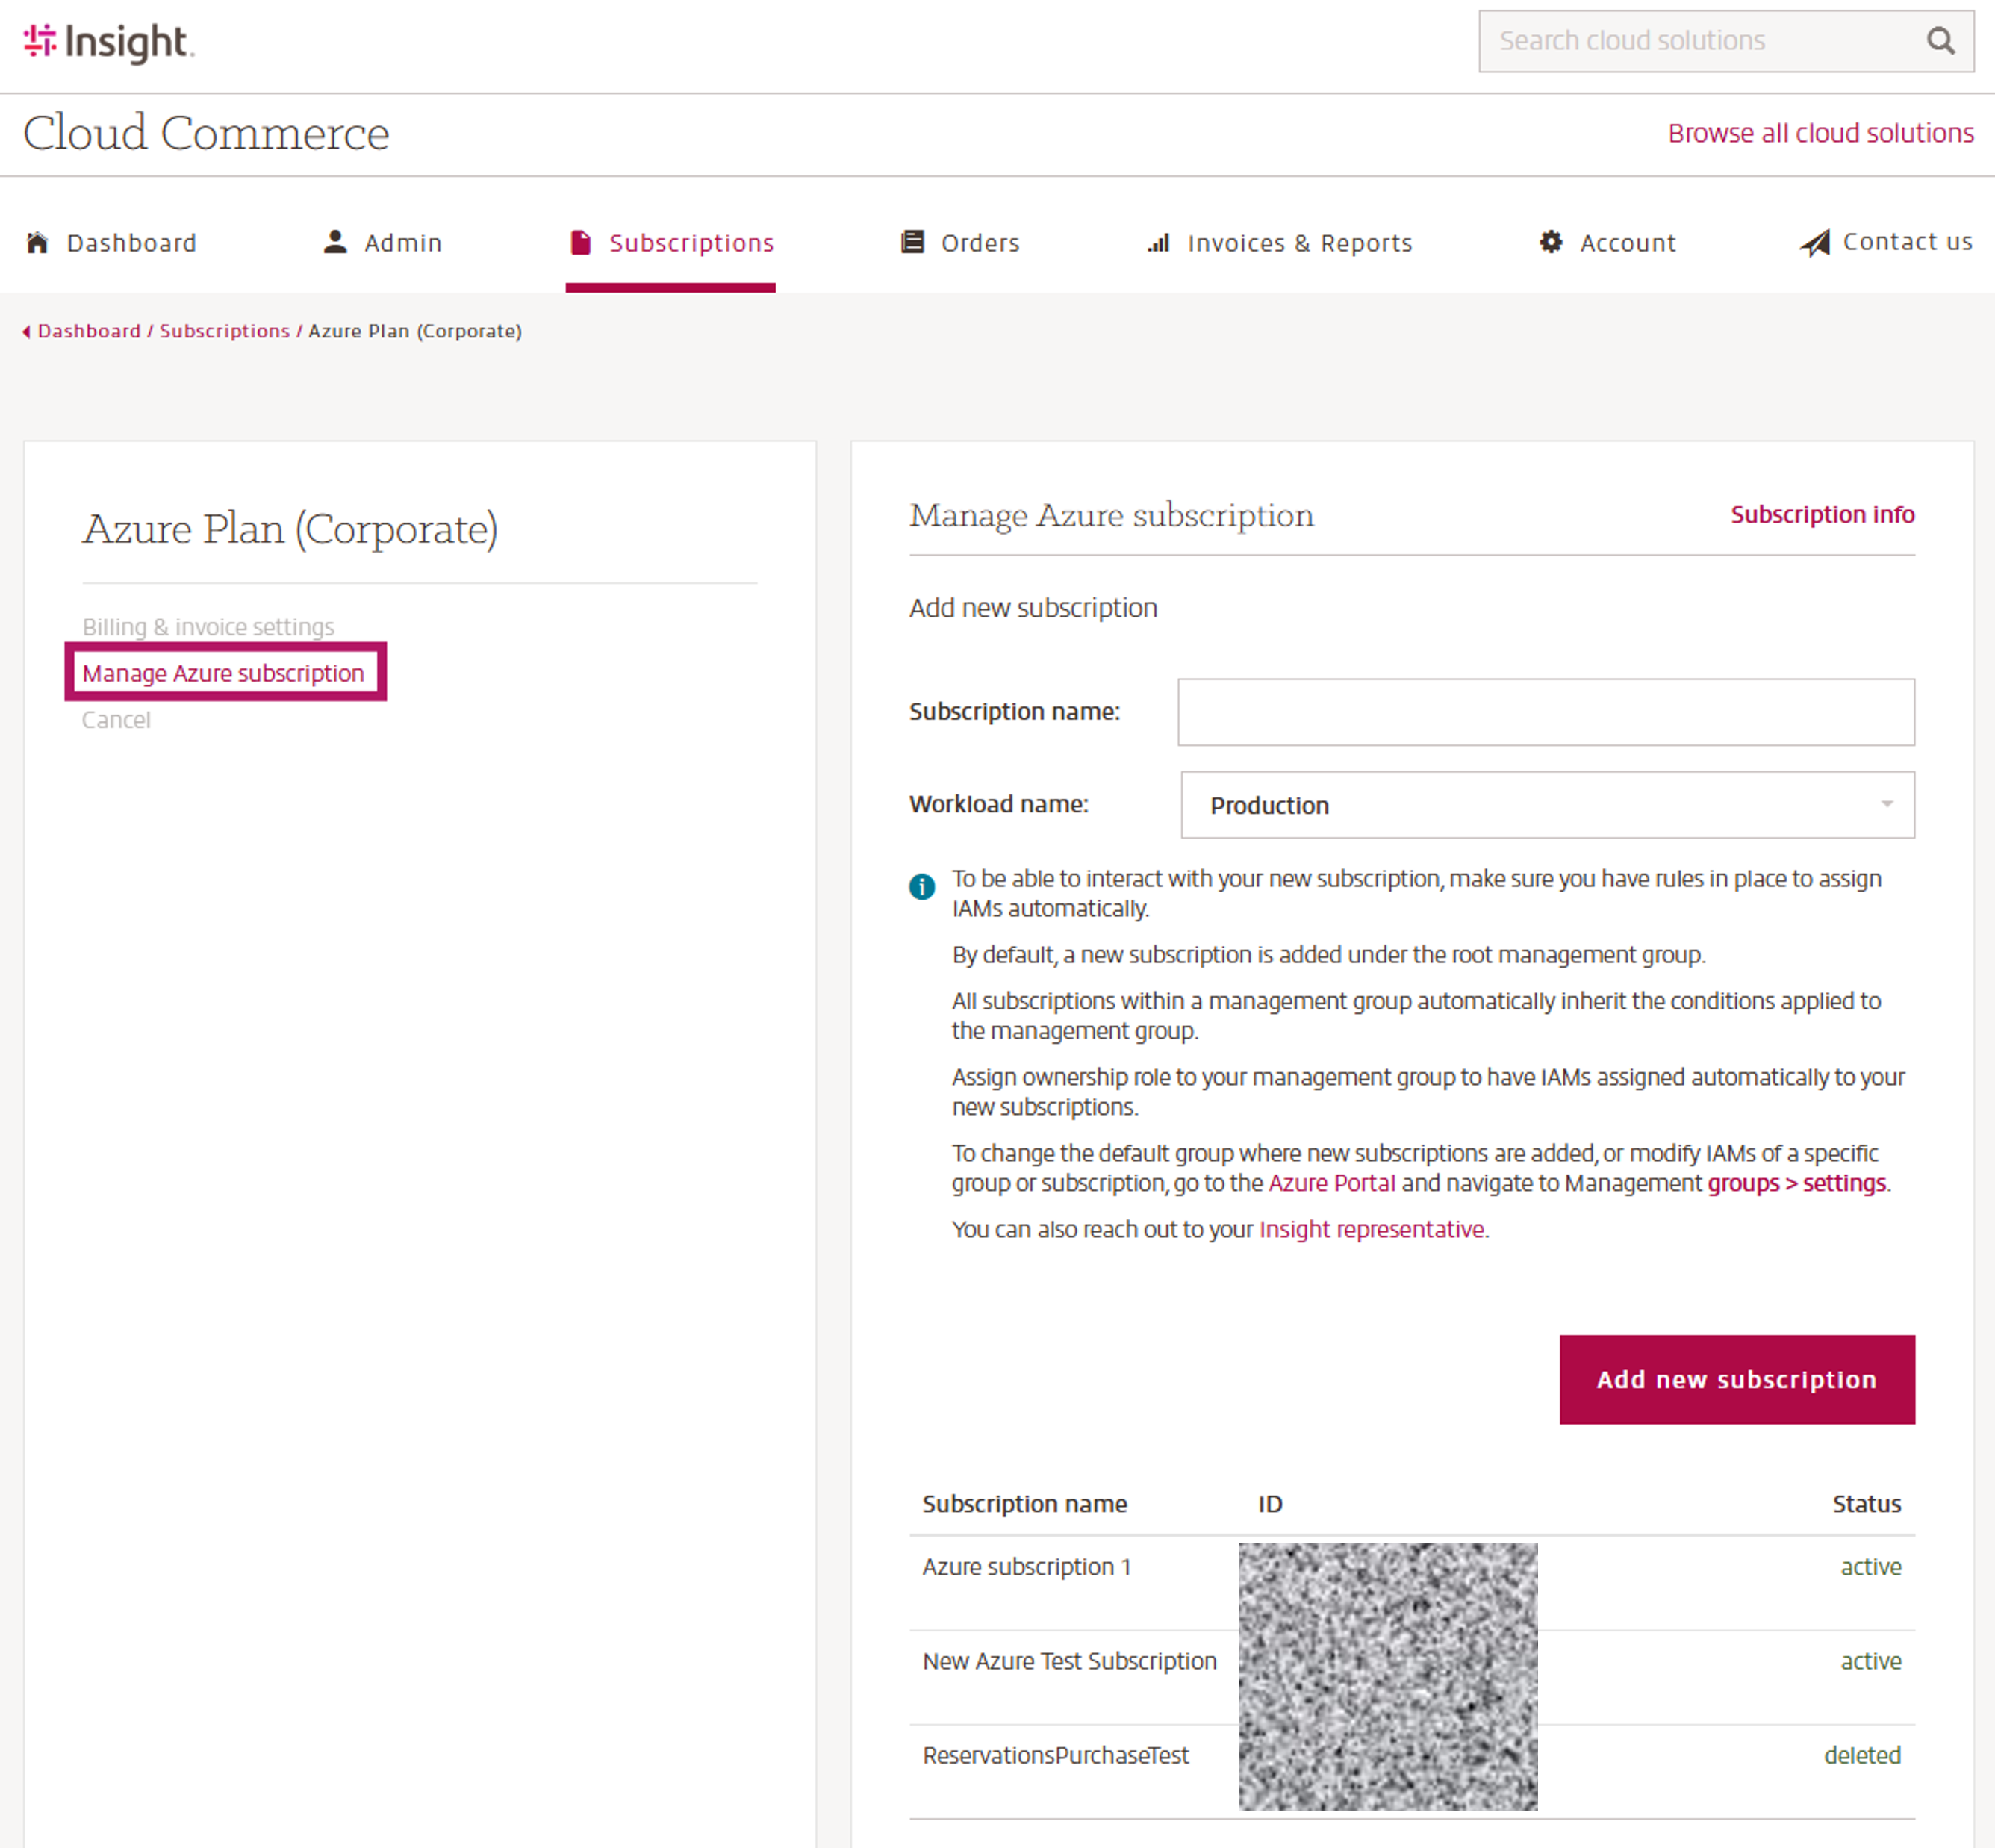
- Select Manage Azure subscription.
- Set the Subscription Name.
- Workload Name will stay Production.
- Once done, click add new subscription and you will get confirmation.
- The bottom part of the page shows the history of Azure subscriptions, where the status can be Active, Canceled, or Deleted. Your newly created Azure subscription will automatically be displayed in this section.
- To be able to interact with your new subscription, make sure you have rules in place to assign IAMs automatically.
Provisioning and Access:
Once the new Azure subscription is created in CCx, it begins provisioning within your organization’s Azure tenant. After you click Add New Subscription, the request is submitted for processing and, once provisioning is complete, the subscription will be visible in the Azure portal (portal.azure.com) under Subscriptions for users with the appropriate permissions.
- For users that have elevated permissions, they can sign in to the Azure portal and navigate to Subscriptions to confirm that the new subscription is listed and has a status of Active.
- Select the new subscription from the list and go to Access control (IAM) to review existing role assignments.
- Ensure that at least one user has a role that can manage access (for example, User Access Administrator). Global administrators can typically elevate their access to this role and then assign additional roles as required.
- Assign appropriate roles (such as Owner, Contributor, or Reader) to users, groups, or service principals that need to view and manage resources within the subscription.
- If your organization does not have a user with sufficient permissions to assign roles, you can contact Insight for assistance with role assignment.
- Any Azure usage and charges incurred under this subscription will be included in your Insight Cloud Care billing and reporting, aligned with the Azure plans procured in CCx.
Budgets and Alerts:
Setting budgets and alerts in Azure is strongly recommended to help you quickly identify unexpected or abnormal usage. As a best practice, after creating a new subscription, ensure you configure budgets and alerts in the Azure portal so that you are notified if spending approaches or exceeds your expected thresholds.
How to Cancel Azure Subscriptions:
- For users that have elevated permissions, they can sign in to the Azure portal and navigate to Subscriptions.
- Select the subscription you want to cancel to open the subscription Overview.
- On the subscription overview page, select Cancel subscription.
- Confirm the cancellation by selecting a reason for cancellation and adding any additional details if necessary.
- Review the cancellation details, then select Cancel Subscription to submit the request.
- After the cancellation is submitted, the subscription status will change (for example, to Disabled or Canceled) once the process completes. You can verify this by returning to Subscriptions and checking the Status column.
- Canceled Azure Subscription will be shown as Inactive in CCx